
Ideal para: Backing up Android photos to a USB flash drive through a computer.
conteúdo
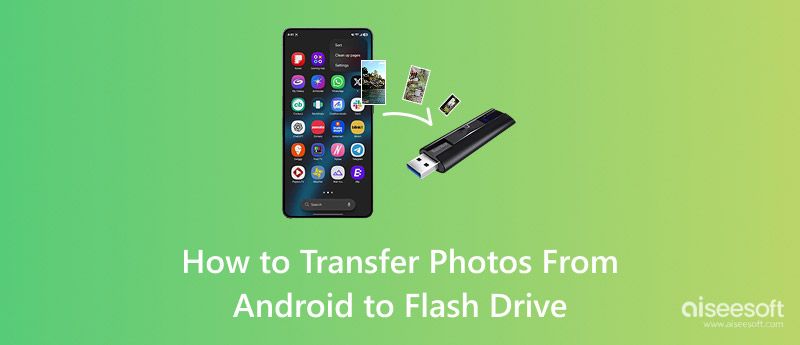
Photos tend to be the major space hogs on phones, and sooner or later, you will probably want to have a safe place where those are kept. A flash drive is one of the top choices because you can carry it in your pocket, it doesn't depend on cloud storage, and it is also very easy and convenient in case you want to make sure that your treasured memories stay protected on a different medium. So, for sure, your question is: how to transfer photos from Android to a flash drive? You have landed on the suitable article. I will present you not just the most suitable option, but also a couple of other methods, and after that, you will be able to pick the one that best works with your hardware, transfer the photos, and at the same time protect your images.
Resumo Rápido
Make sure you have the right gear for the file transfer at hand before you settle on a transfer method. To help clarify that, here is a summary of the requirements and user types for each of the transfer methods.
| Forma | Requisitos | Mais Adequada Para |
| USB-C Flash Drive or OTG Adapter | Android phone with USB OTG support, USB-C flash drive or OTG adapter | Fast, direct transfers without a computer |
| Aiseesoft FoneEase | Windows PC, Aiseesoft FoneEase, USB cable, flash drive | Managing and transferring large photo collections with more control |
| Usando um computador | Computer, USB cable, flash drive | Backing up photos when a direct connection isn't available |
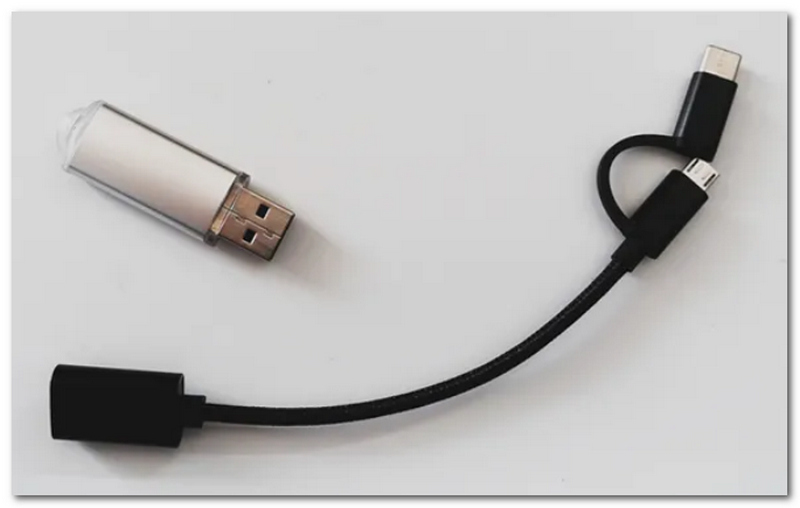
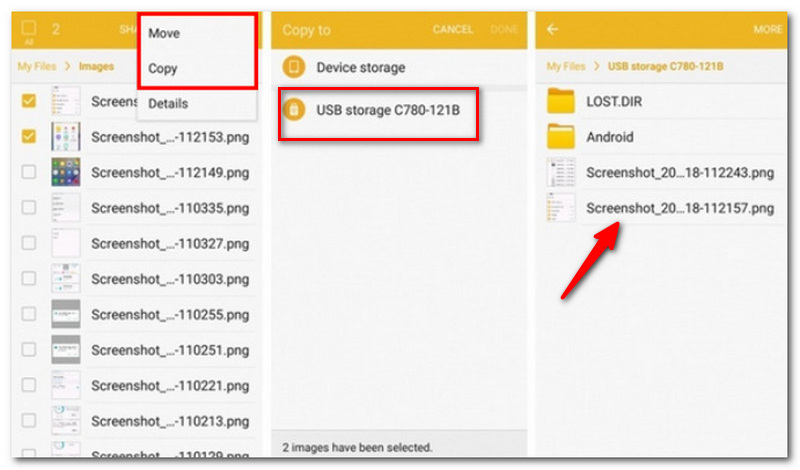
One simple method to move your pictures from your Android mobile phone to a flash drive is with a USB-C stick or an OTG (On-The-Go) converter. As only the mobile and the flash drive are involved in the data exchange process, no computer or internet is required.
Mais Adequada Para: Backing up Android photos directly to a USB flash drive.
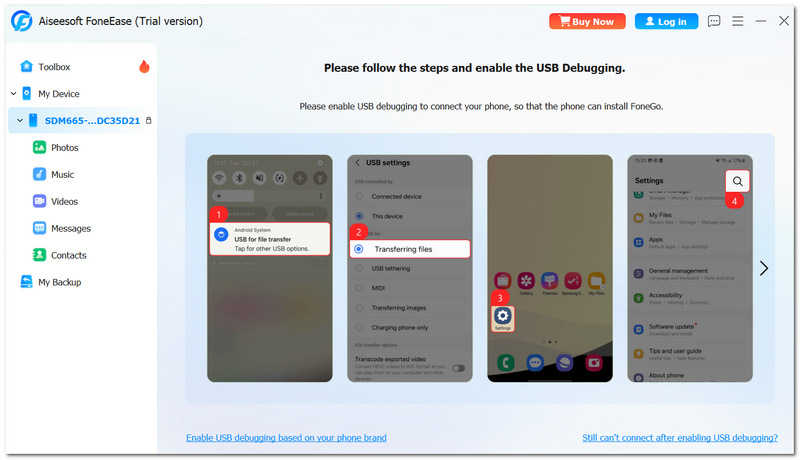
If you want to exercise more control over your photo backups, you could go for Aiseesoft FoneEase. With it, you can take a look at your photos, order them, and also transfer them from your Android device to a computer, so that later, you can make copies to a flash drive more easily. This type of approach comes in handy when you're a person who is backing up several thousand photos.
Ideal para: Backing up Android photos to a USB flash drive through a computer.
Principais características
 100% seguro. Sem anúncios.
Steps to Transfer Photos with Aiseesoft FoneEase
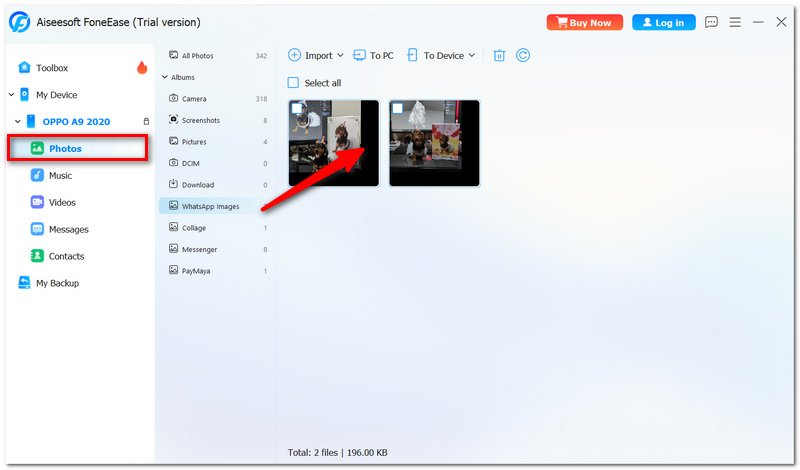
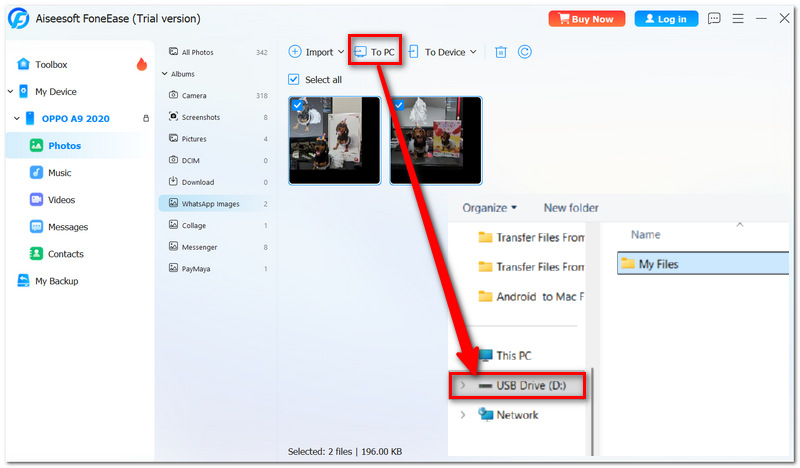
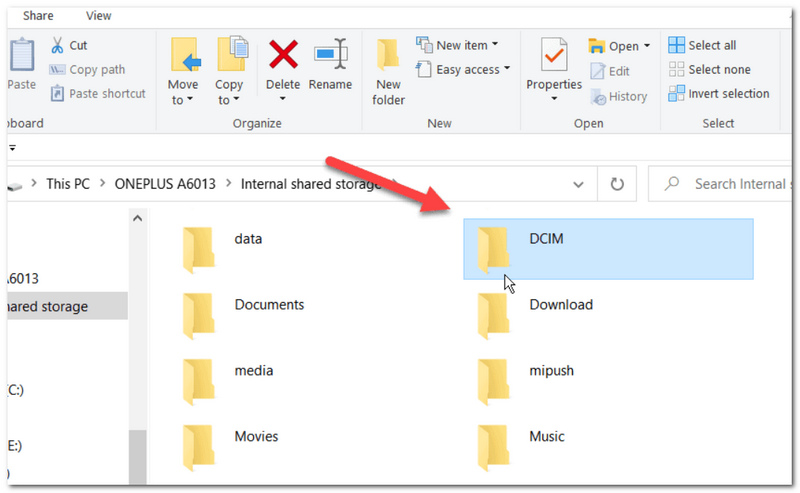
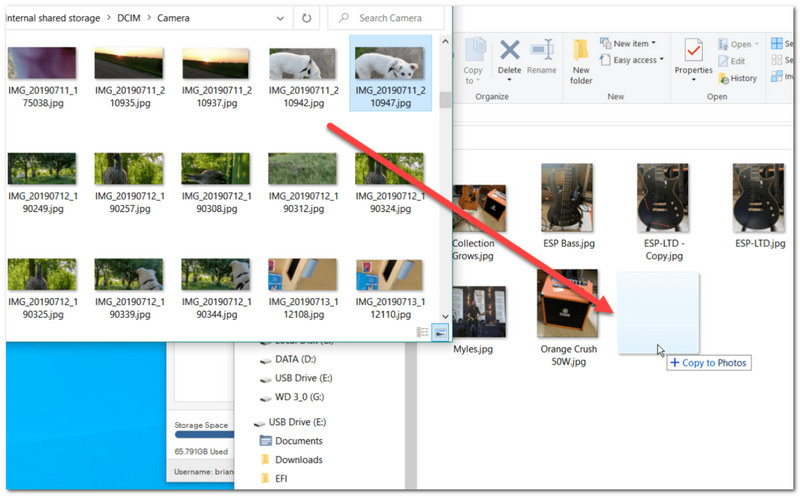
If you are using a device that doesn't require an external USB storage device via a USB-C port, then a good way for you to keep your phone's photos safe is through your PC. By this method, you can first transfer pictures from your phone to your PC and then to your portable USB drive.
Ideal para: Moving large batches of photos from Android to a flash drive.
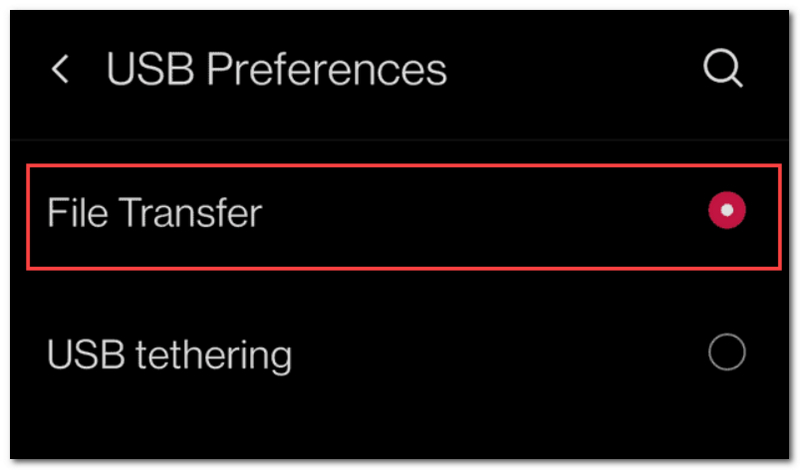
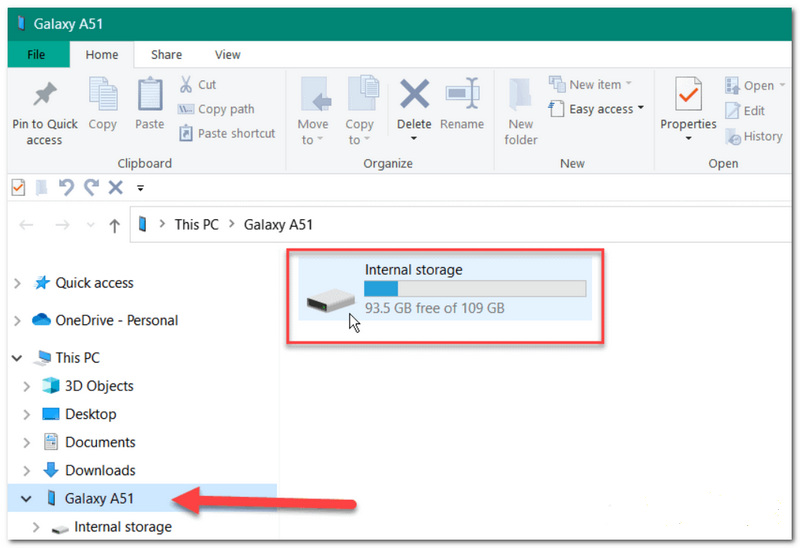
Should I transfer photos from the phone regularly or wait until the phone is full?
Regularly transferring photos is better because it is a good way to free up space, and at the same time, it helps reduce the probability of losing very important photos if your phone gets damaged or lost.
Is there a way to get photos out of my Android phone with a broken screen?
If the phone is touch-responsive or an external mouse can be connected through an OTG adapter, you can still get data out of the Android with a broken screen e transferi-los.
Why does my USB stick heat up when I am copying files?
One would say it is quite natural for a USB stick to get a bit warm while transferring a large number of files. Still, in case it gets very hot, you should stop the file transfer and allow it to cool down.
Conclusão
Having understood the methods of how to transfer photos on Android to a flash drive, you can now decide which one suits your device setup better. For those of you, it will definitely be easier to directly transfer the images, while others will prefer a method that involves a Windows or MAC computer. Either way, having an extra copy of your photos on a flash drive is the perfect and easy solution for storage management as well as preserving your priceless memories.
 Lidar com telefone Android quebrado: melhores maneiras de consertar e salvar seus dados
O telefone celular está em alto risco de danos. Se você quebrá-lo acidentalmente, esta postagem oferecerá as melhores maneiras de ajudá-lo a corrigi-lo e maximizar a proteção de dados.
 7 métodos fáceis para alterar a resolução das imagens do Android
Este guia mostrará como alterar a resolução de uma imagem no seu celular/tablet Android de forma rápida e fácil, sem perder qualidade.
 Como abrir imagens HEIC no dispositivo Android com alta qualidade
O HEIC vem com o recurso mais notável que traz maior qualidade e menos espaço. Quando se trata de abrir o HEIC no Android, você precisará deste guia.
O Aiseesoft FoneEase é uma ferramenta de transferência e gerenciamento de dados que permite mover, fazer backup e gerenciar diversos dados entre iOS, Android e computadores de forma integrada, sem precisar redefinir o telefone ou usar o iTunes.
100% seguro. Sem anúncios.

*Campo obrigatório
*Por favor, insira um e-mail válido